How to use Rocketadmin agent with AWS RDS and EC2 instances
Rocketadmin enables you to create connections to the databases you host with a cloud provider through our agent tool and with the help of a virtual server.
The user guide will provide a detailed, step-by-step approach to implementing the following:
The Rocketadmin application establishes a connection with the Rocketadmin agent which operates within a Docker container located on an AWS EC2 instance.
The AWS EC2 instance interacts with a non-public AWS RDS instance, which subsequently connects to your database server.
This architectural approach guarantees that your database credentials stay private and are not disclosed to us.
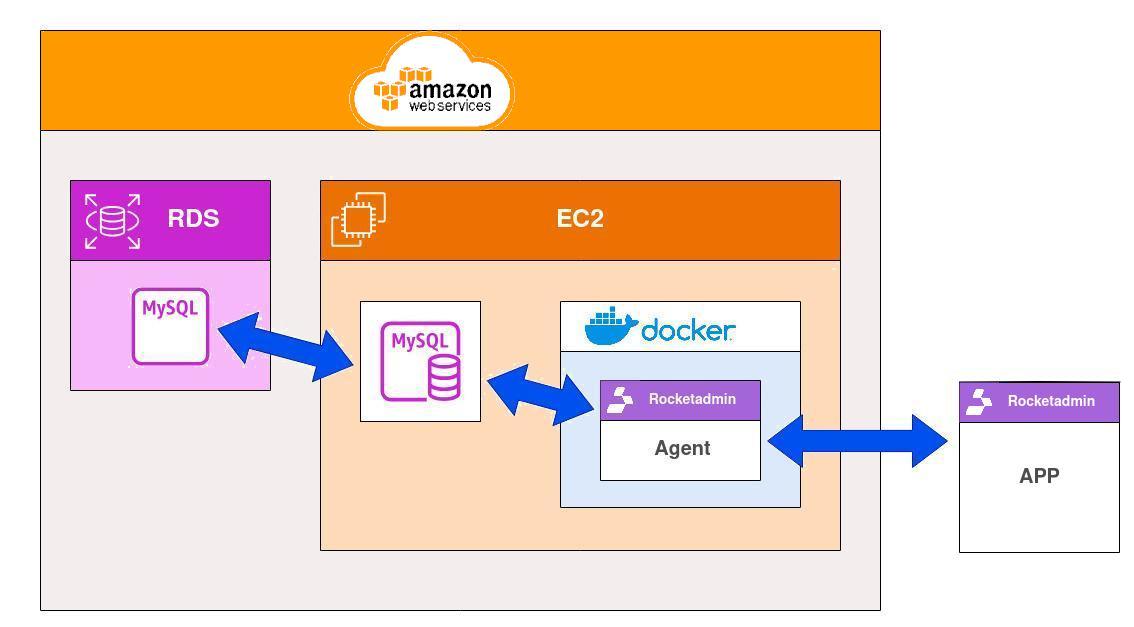
The guidelines pertain to a MySQL database; however, they can also serve as a useful reference for establishing connections to various other database types and host addresses.
Prerequisites
Enable your SSH client
Ensure that an SSH client is installed on your system. This user guide will utilize OpenSSH for demonstration purposes.
AWS configurations
Launch an EC2 instance
-
Sign in to your AWS account.
-
From the Dashboard, enter EC2 in the Search field:

-
Click on EC2.
-
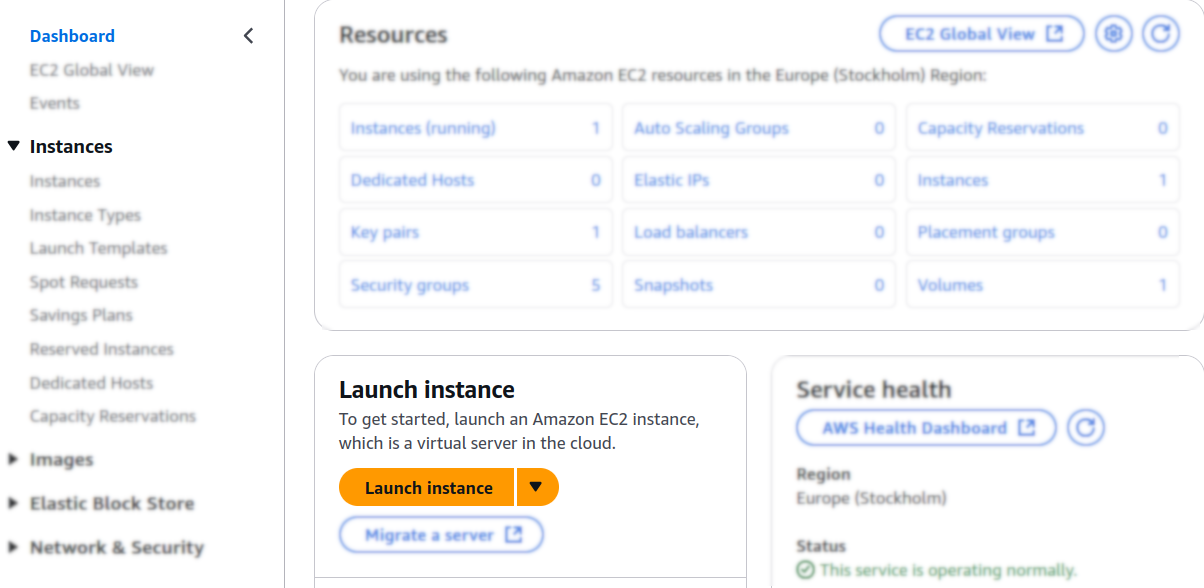
In the next screen click on Launch instance:
-
Enter a name for the instance:

-
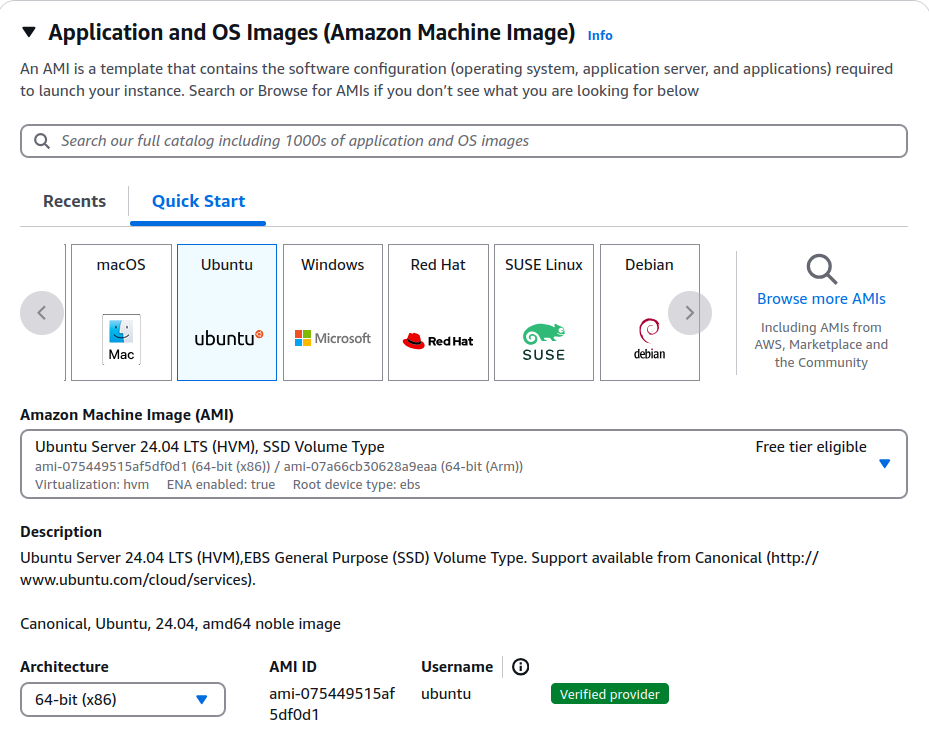
Select an AMI (Amazon Machine Image), for example, Ubuntu:
-
Select an Instance type:

-
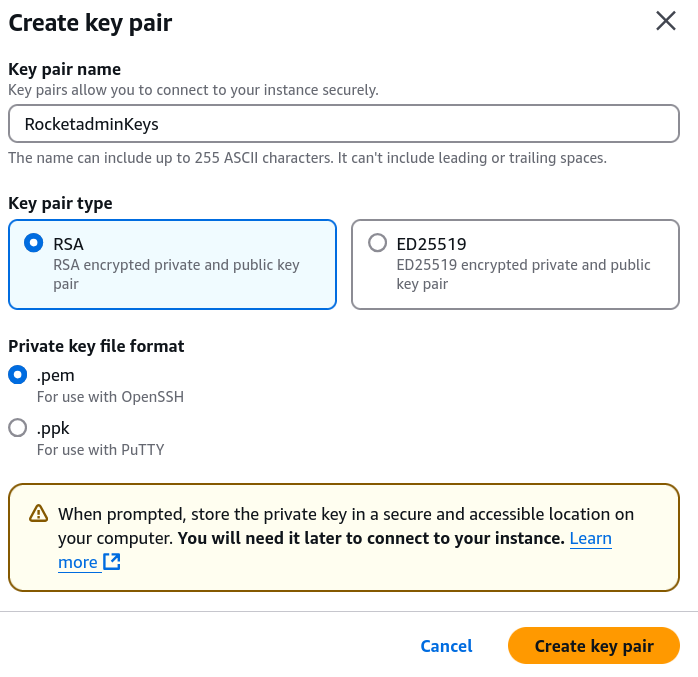
Create a new key pair to securely connect to your instance:

-
From the Network settings section create a new security group and allow SSH traffic from your IP address:
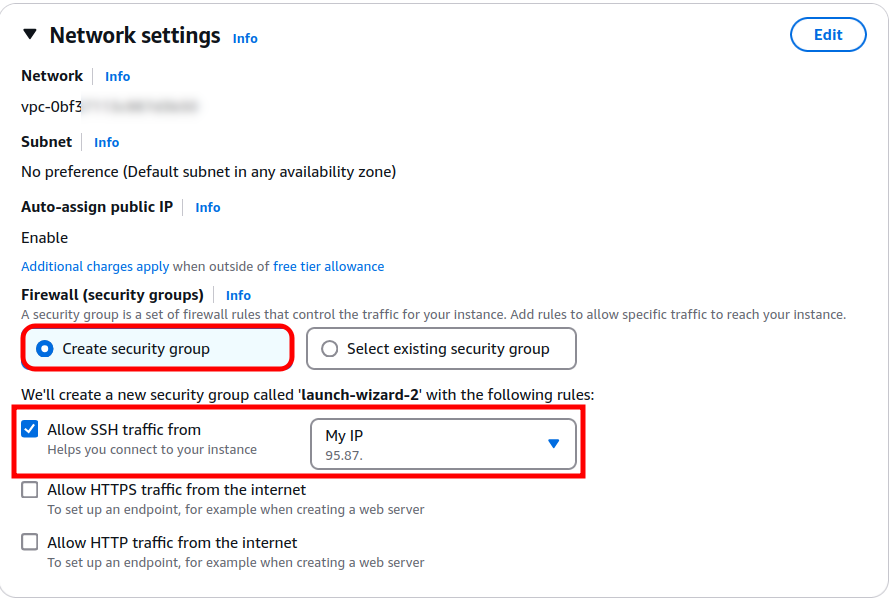
You can configure other EC2 parameters in the Storage and Advanced details panels.
- From the Summary section click on Launch instance to complete the steps:
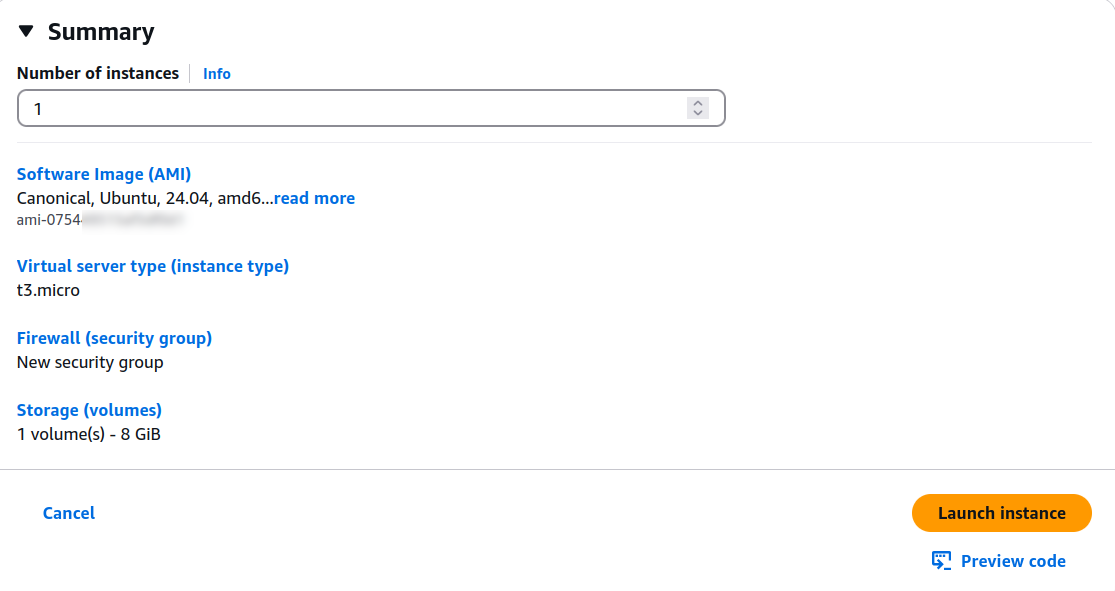
- Wait a few moments until the instance state becomes Running:

Connect and configure the EC2 instance
The following procedures include updating the EC2 machine, installing Docker and pulling the Rocketadmin agent image.
The guidelines pertain to the selected type of Amazon Machine Image, which is Ubuntu.
Connect to the instance
-
In the EC2 instances screen select your instance and click on Connect:

-
Navigate to the SSH client tab and execute the recommended steps:
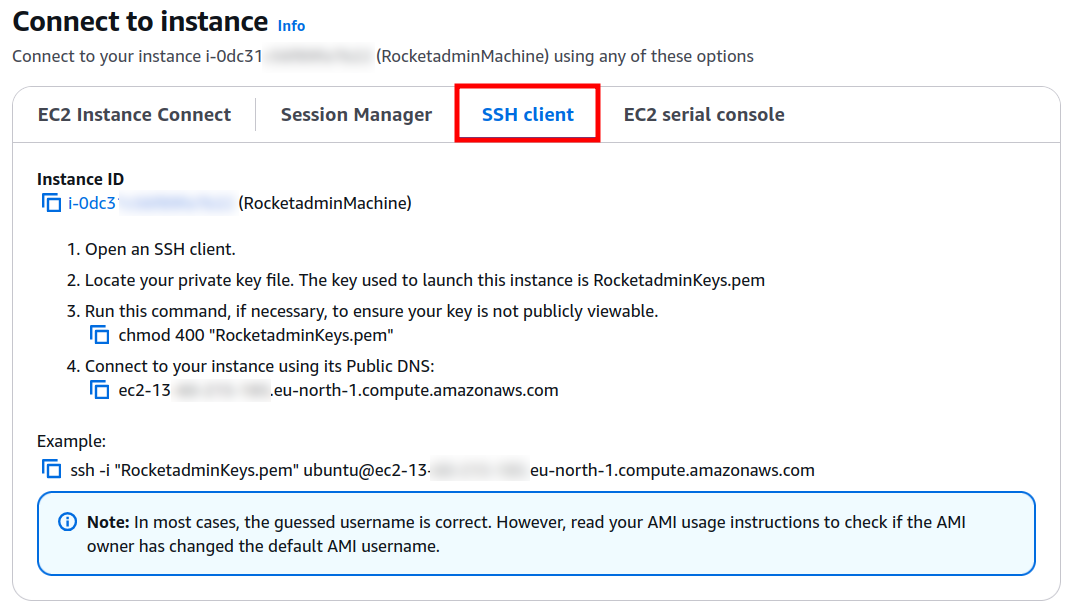


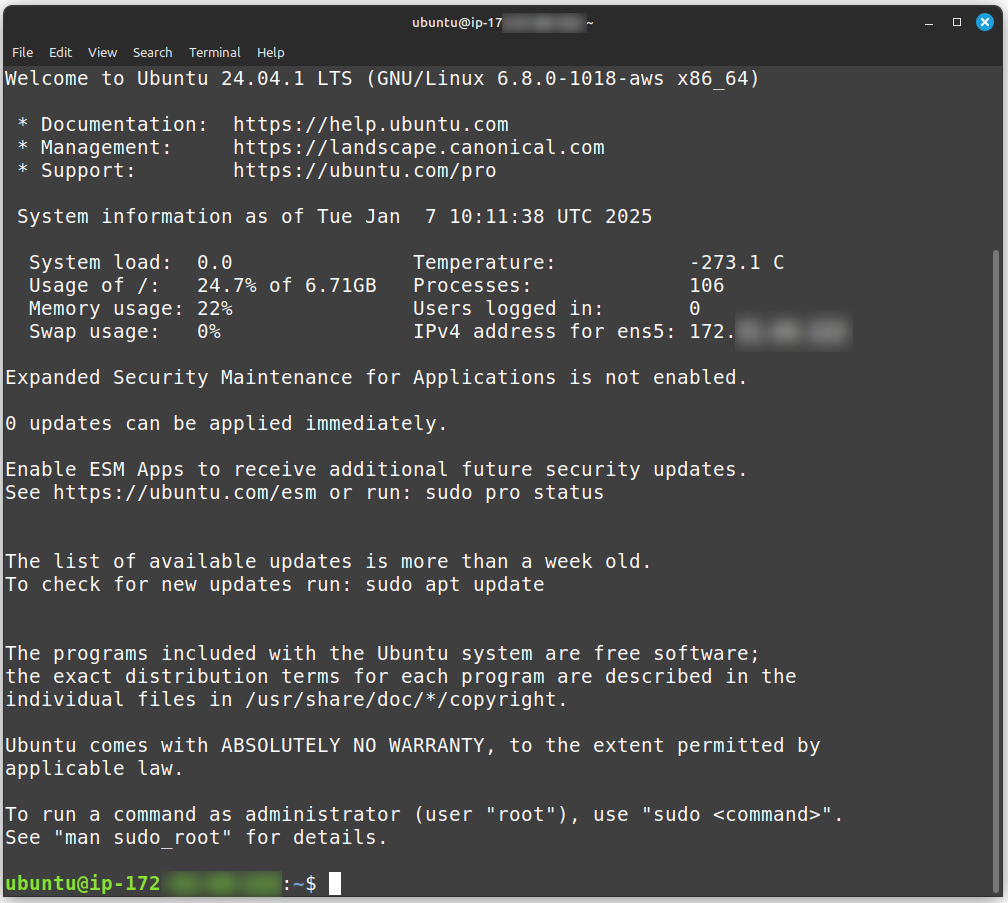
Configure the instance
-
Update the system and install Docker dependencies:
sudo apt updatesudo apt install curl apt-transport-https ca-certificates software-properties-common -
To install the most current Docker version from the official repository, download the Docker GPG key:
curl -fsSL https://download.docker.com/linux/ubuntu/gpg | sudo gpg --dearmor -o /usr/share/keyrings/docker-archive-keyring.gpg -
Add the Docker APT repository to your system:
echo "deb [arch=$(dpkg --print-architecture) signed-by=/usr/share/keyrings/docker-archive-keyring.gpg] https://download.docker.com/linux/ubuntu $(lsb_release -cs) stable" | sudo tee /etc/apt/sources.list.d/docker.list > /dev/null -
Update again the system:
sudo apt update -
Install Docker Community Edition (free to download and use) with the
-yoption for non-interactive installation:sudo apt install docker-ce -y -
The Docker service starts automatically upon installation and you can verify that its status is active (running):
sudo systemctl status docker

-
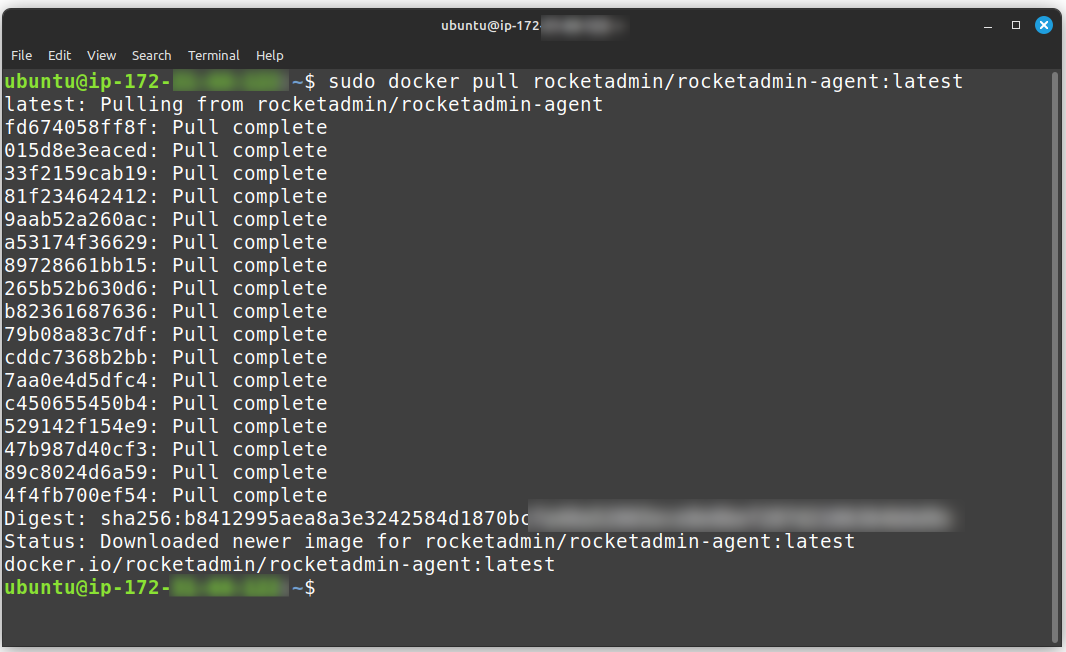
The final step in this section is to pull the Rocketadmin agent image:
sudo docker pull rocketadmin/rocketadmin-agent:latest
Create an RDS instance
-
Sign in to your AWS account.
-
From the Dashboard, enter RDS in the Search field:

-
In the navigation pane of the next screen click on Databases:

-
Click on Create database.
-
In the next screen:
-
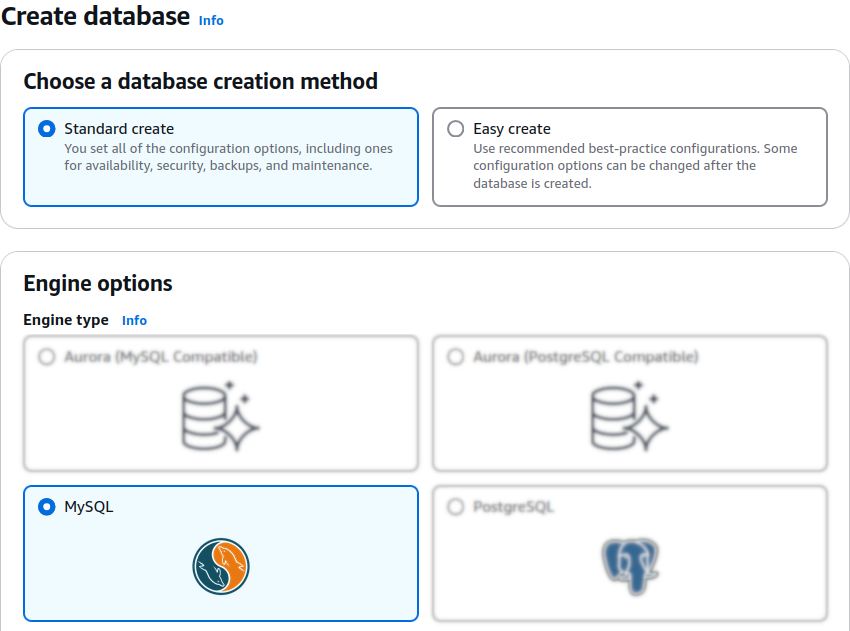
select Standard create as database creation method
-
choose MySQL engine type
-
enter a name for the instance

-
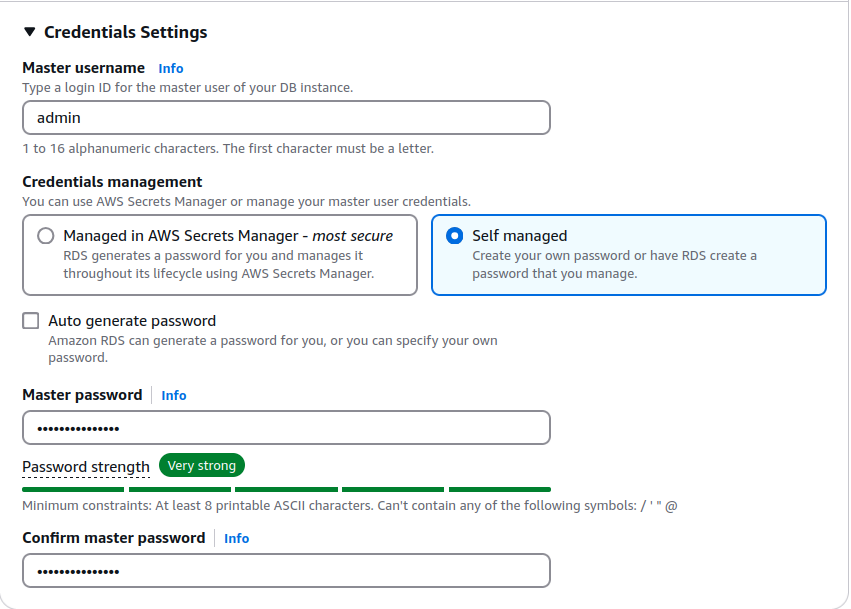
manage the credentials based on your preferences
-
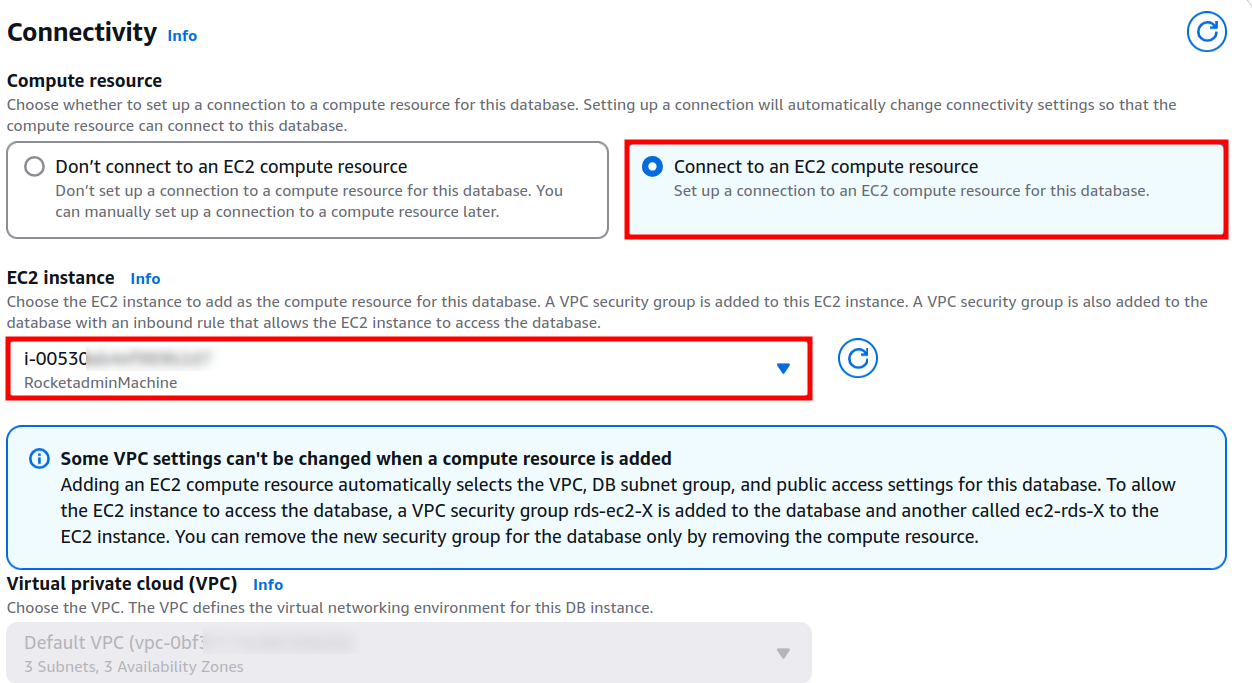
in the Connectivity section mark Connect to an EC2 compute resource and select your EC2 instance
-
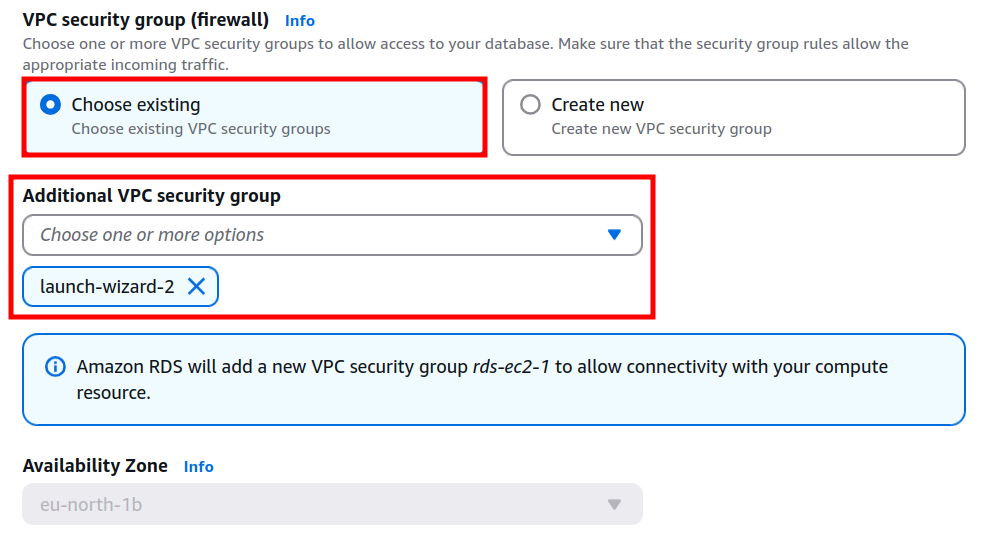
select the VPC security group added during the creation of your EC2 instance
-
choose your preferred option for Database authentication

-
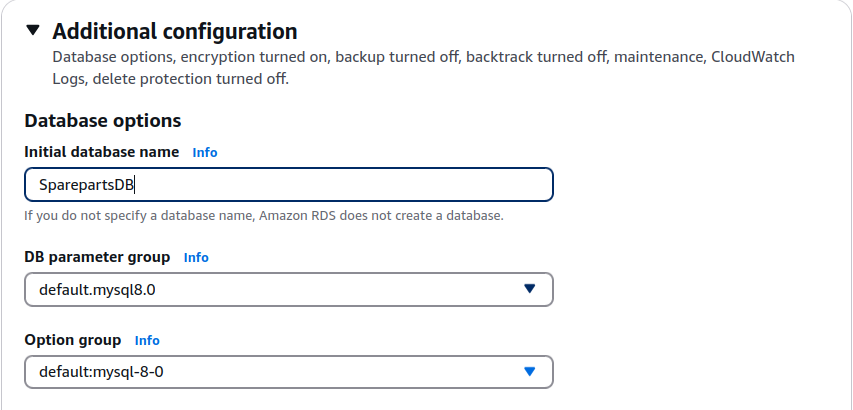
expand the Additional configuration options and enter an initial name for your database
-
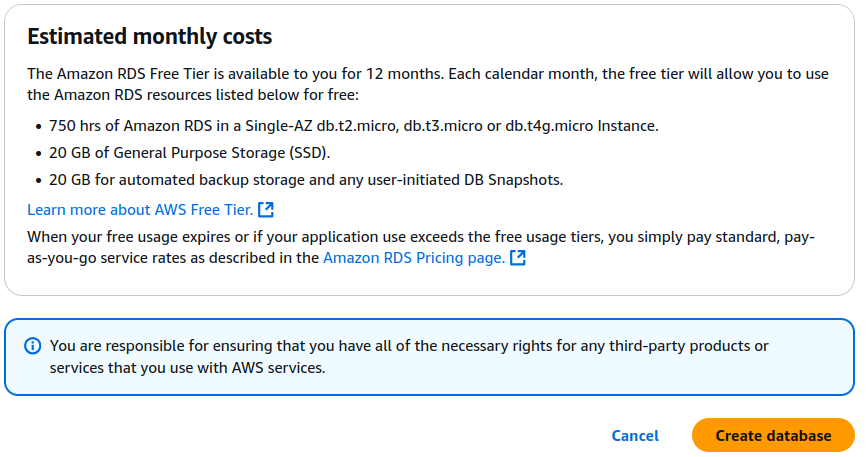
review your Estimated monthly costs and click on Create database
-
Wait a few moments until the RDS instance status becomes Available:

Security group configuration
The security group established during the EC2 instance creation, which is also enabled for the RDS instance, must be configured with a suitable inbound rule to allow data traffic between your databases and the Rocketadmin application and agent.
To configure the security group:
-
From the RDS Databases menu click on the database instance name to open the detailed view:

-
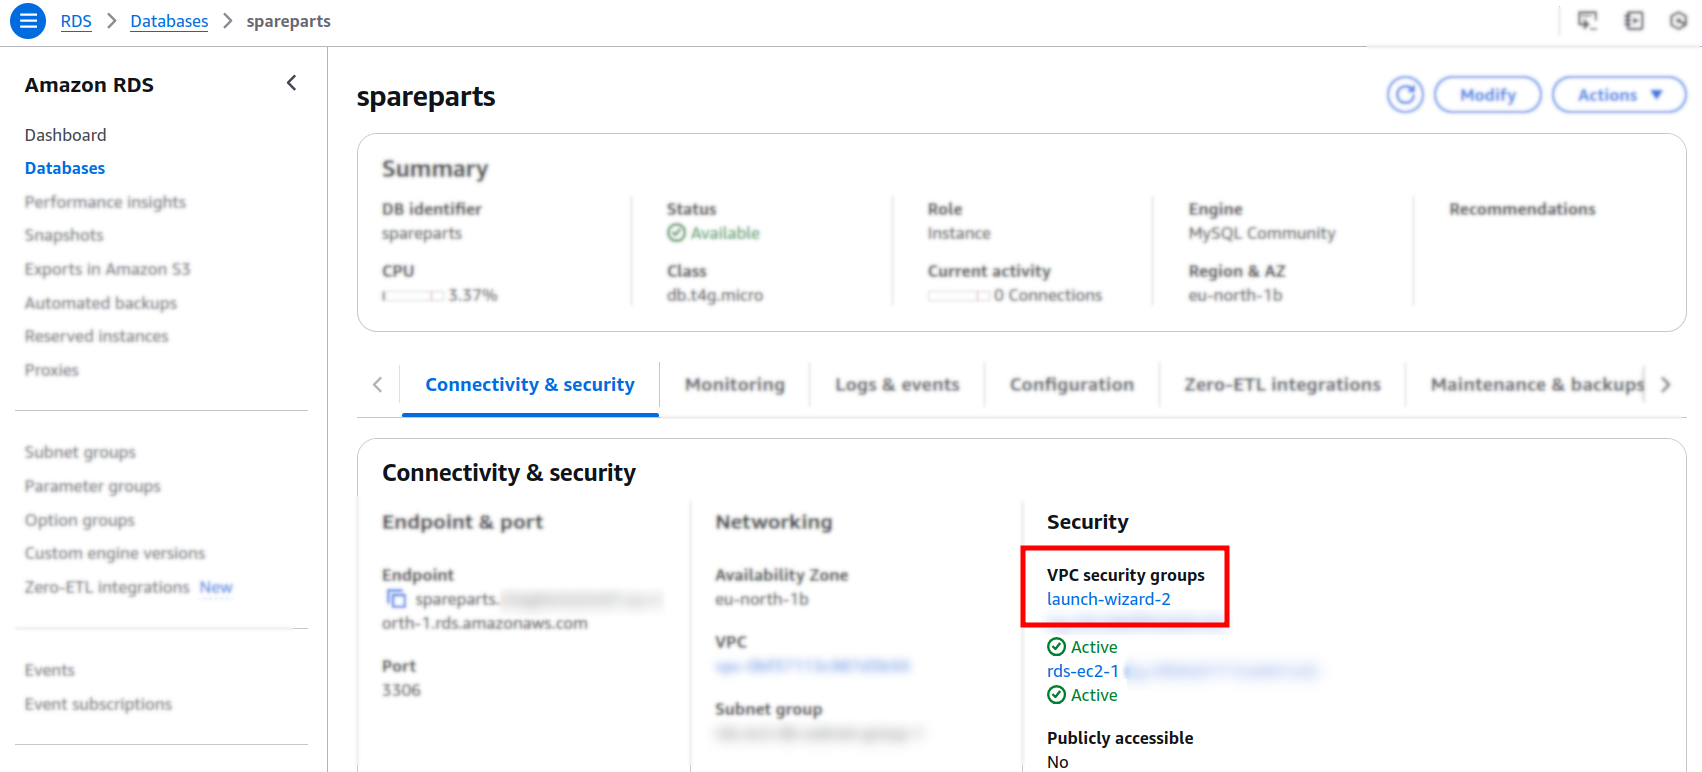
In the next screen click on the name of the VPC security group:
-
Mark the security group checkbox:

-
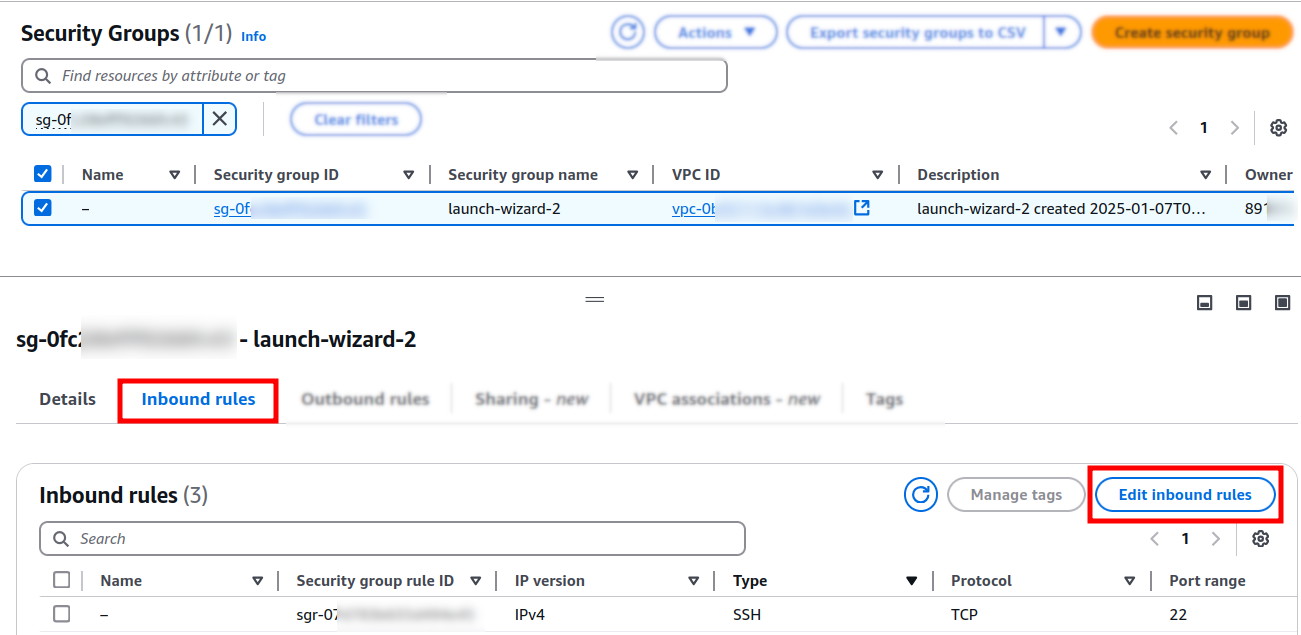
Navigate to the Inbound rules tab and click on Edit inbound rules:
-
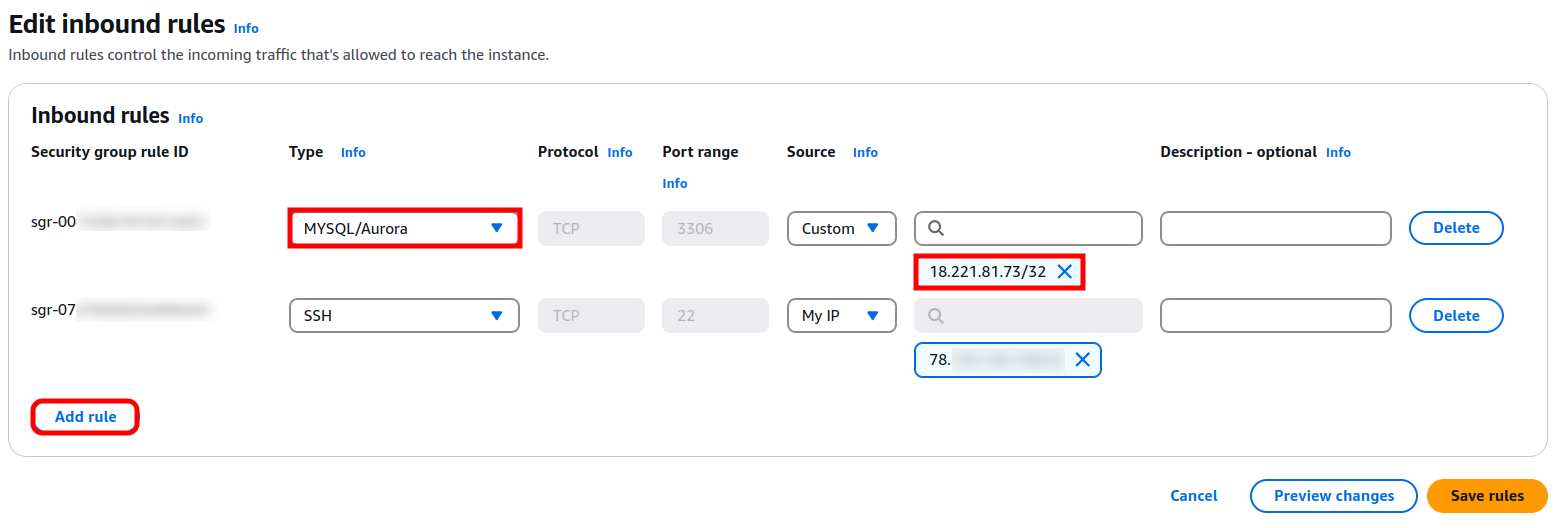
In the Edit inbound rules screen:
-
click on Add rule
-
select MySQL/Aurora as Type
-
enter the Rocketadmin IP address - 18.221.81.73/32 as trusted source, granting us access to your database
-
-
Click on Save rules to confirm the changes.
MySQL installation and configuration
To install and configure MySQL server on your EC2 instance follow the steps below:
-
Connect to your EC2 instance using its public DNS and your private key:

-
Install the MySQL server:
sudo apt install mysql-server
-
Verify that after installation the MySQL status is Active (running):
sudo systemctl status mysql

-
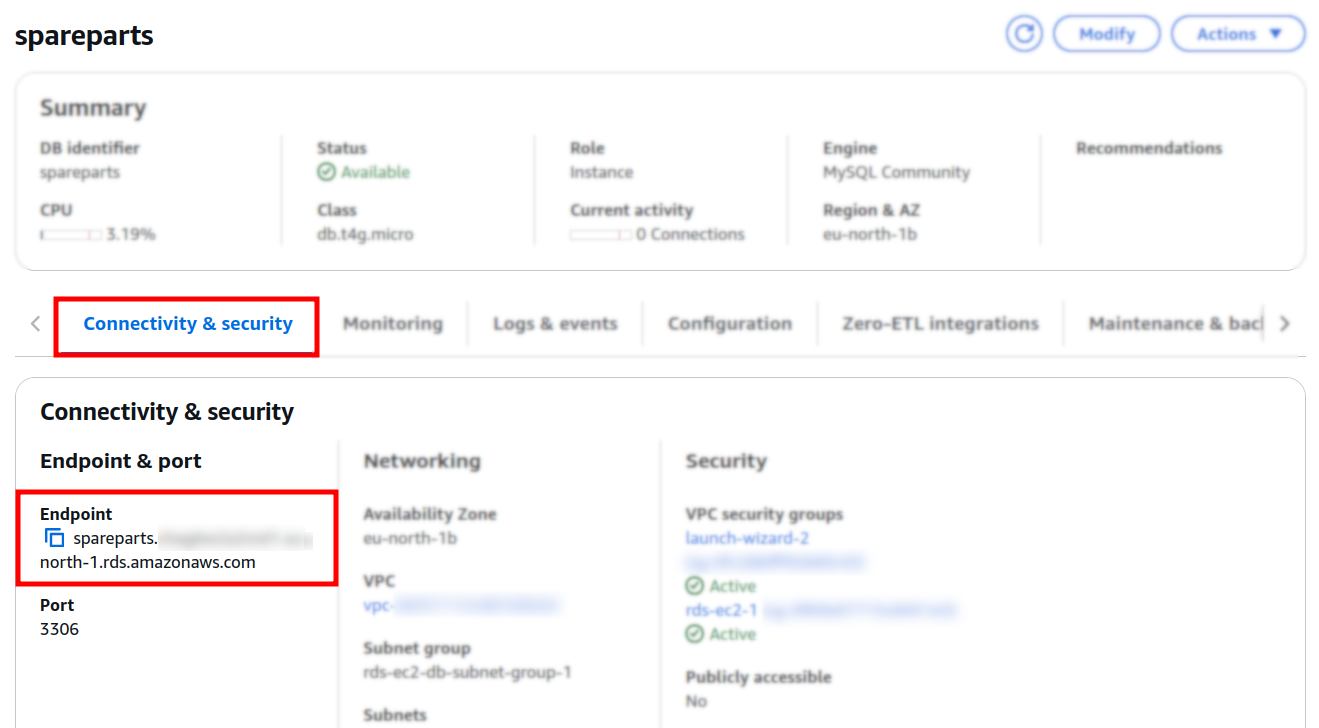
Open the AWS RDS -> Databases menu and click on the name of your instance to review the details:
-
From the Connectivity and security tab copy the public endpoint.
-
Connect to the RDS instance as follows:
mysql -h <rds-endpoint-name> -P 3306 -u <your-rds-username> -pWhen prompted, enter your password:

-
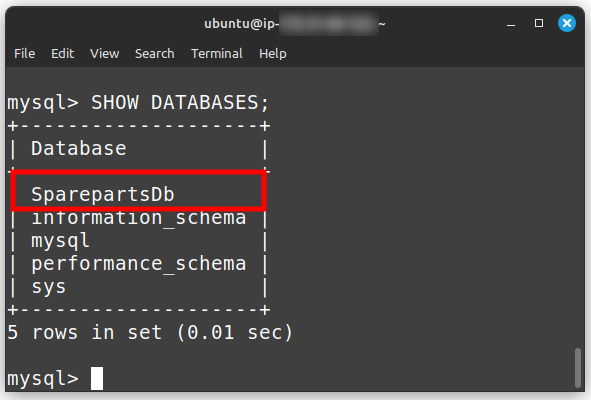
Enter the command SHOW DATABASES; to verify the presence of your RDS database:
-
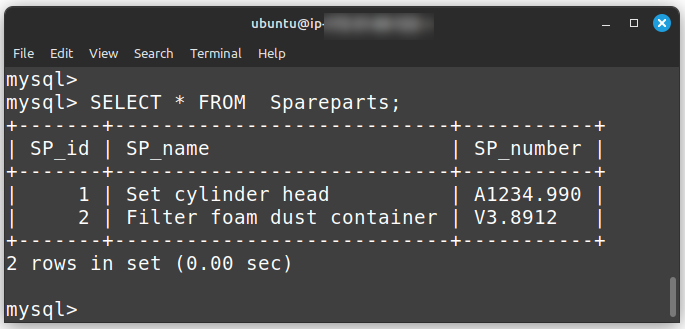
Create a table and insert some values.
-
Review your data:
Rocketadmin settings
Generate token
-
Sign in to your Rocketadmin account.
-
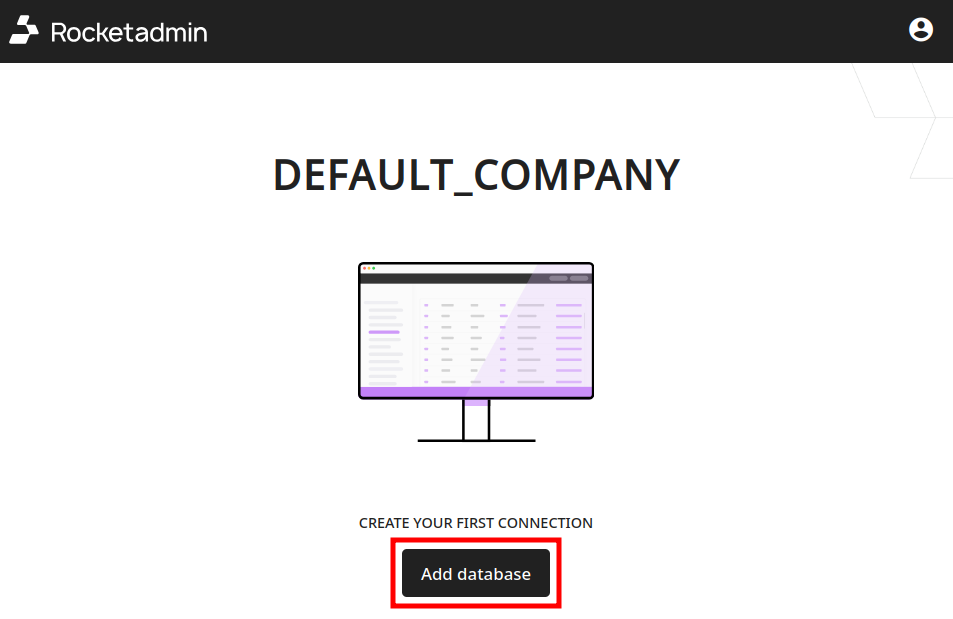
In the Dashboard click on Add database:
-
In the Connect a database screen:
-
enter a name for the connection
-
select your database type
-
click on Agent connection

-
-
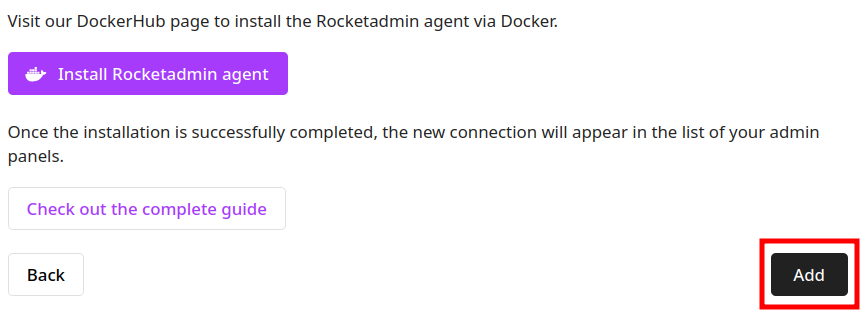
Click on Add:
-
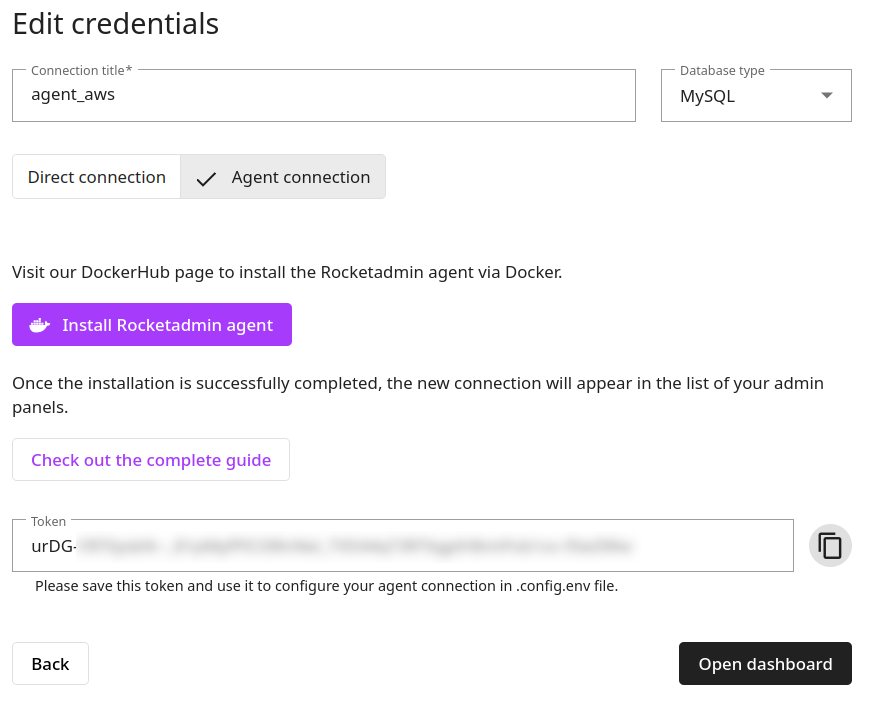
After the Token field appears, click on to copy your unique connection identifier:

Save the token for later use.
If the Rocketadmin agent configuration screen is reloaded/closed or you click on Back, a new token will be generated.
Create environment configuration file
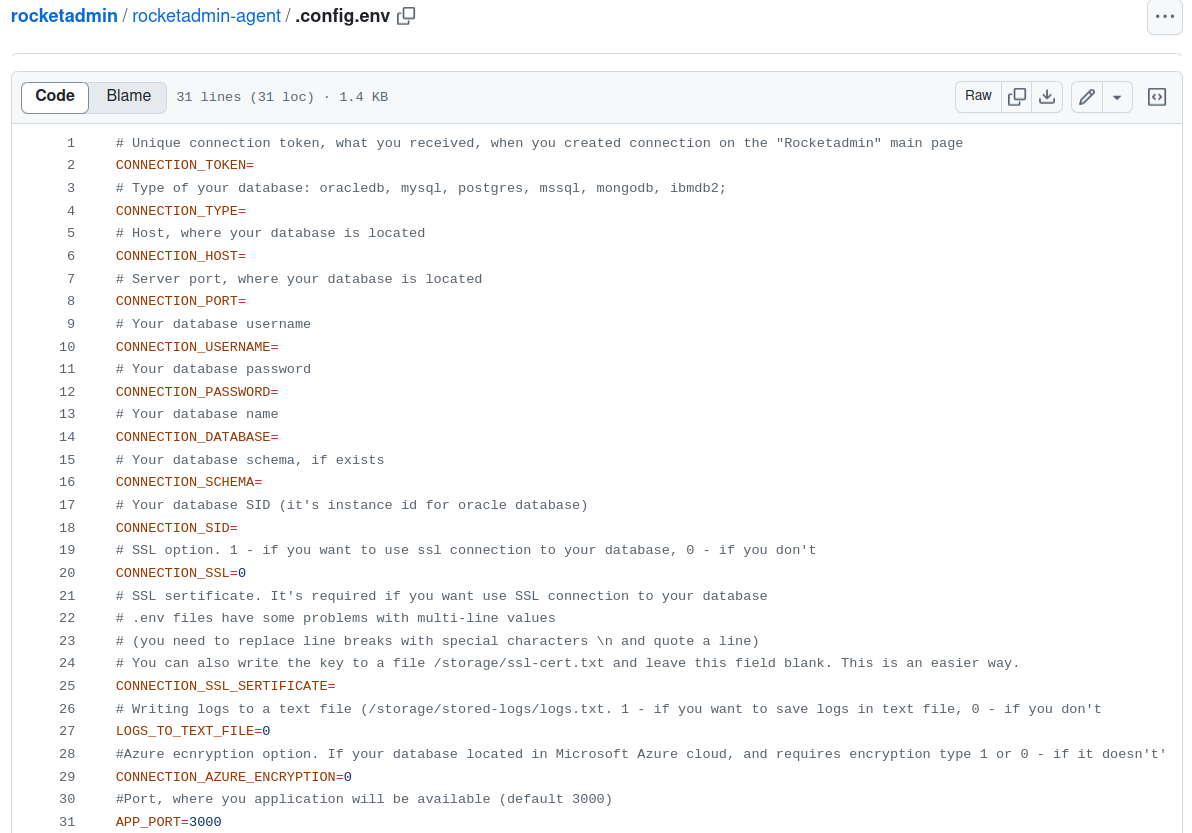
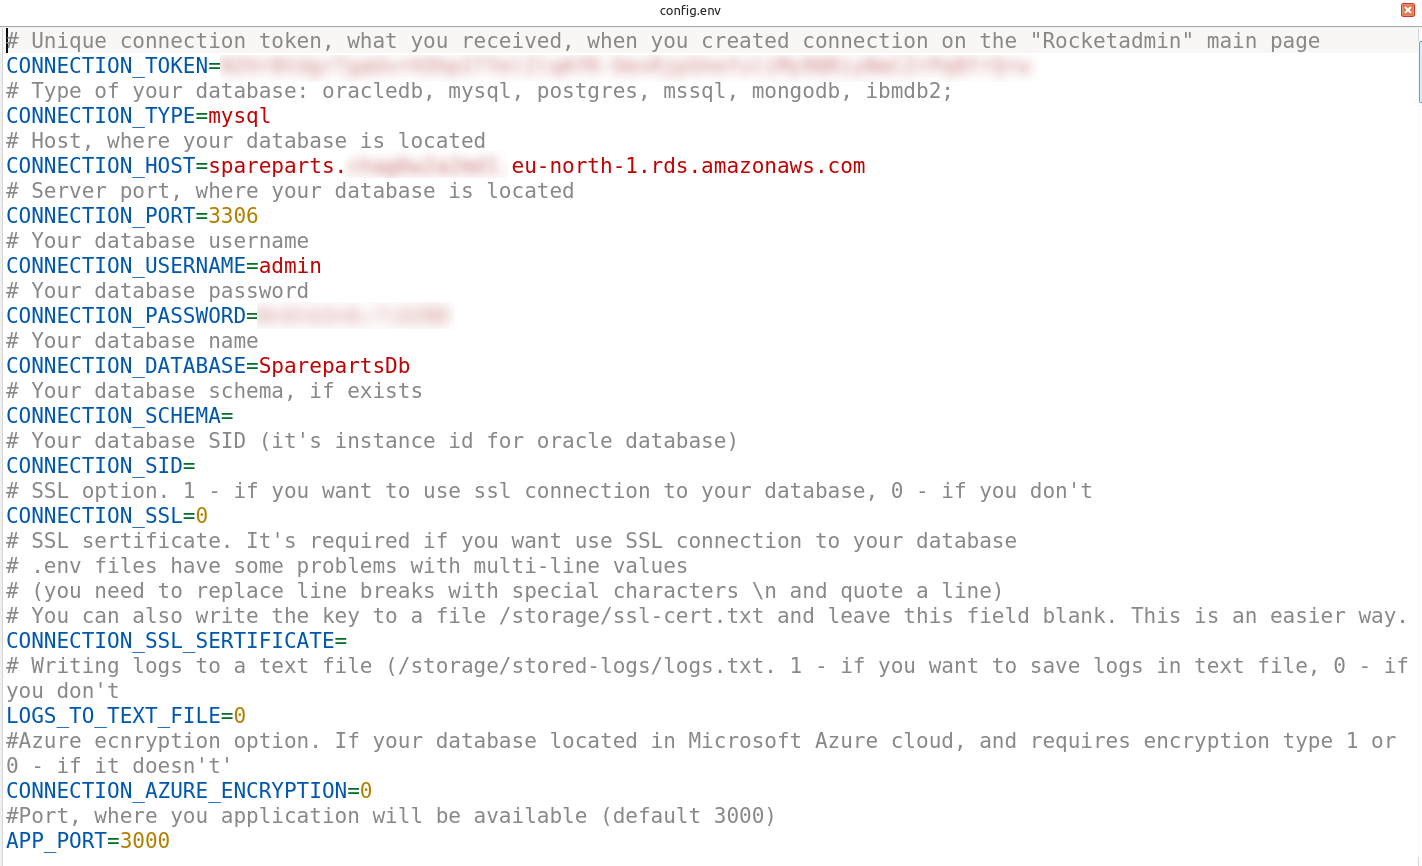
The Rocketadmin agent requires particular data input. The most efficient way to pass the information is by creating an environment configuration file that includes all necessary variables, such as the saved token, database type, host, port, credentials, and other security-related details.
To create the file:
-
Download the configuration template from the Rocketadmin Github page:
-
Complete the necessary information and save the environment file. Here is a representation of what a .config.env file could resemble:
-
Connect to your EC2 instance using its public DNS and your private key:

-
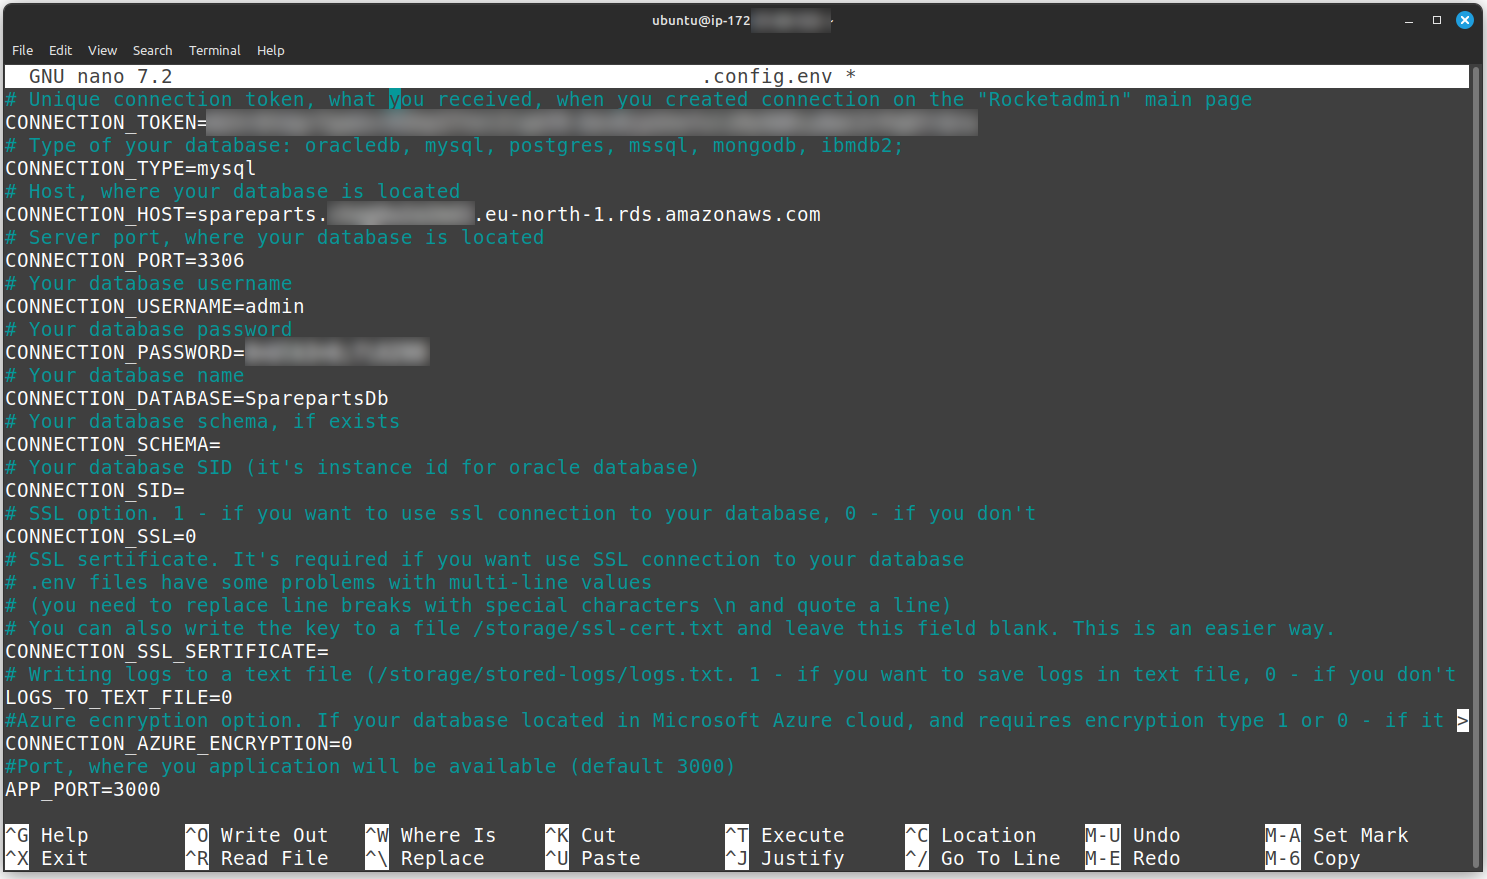
Create the .config.env file and open it for editing:
sudo touch .config.envsudo nano .config.env
-
Copy and paste the content of your locally created .config.env file into the new EC2 .config.env:
-
Save the changes.
Run the Rocketadmin agent
-
In the Terminal application (or Command line) execute the following command from the folder where your .config.env file is located:
docker run --network=host --env-file .config.env rocketadmin/rocketadmin-agent:latest
Upon successful establishment of the connection, the following messages will appear, along with some additional information:
-
Database successfully connected
-
Application launched
-
Connected to the remote server

Review your database table in Rocketadmin
To display the table, you need to go back to the Rocketadmin connection screen and click on Open Dashboard:
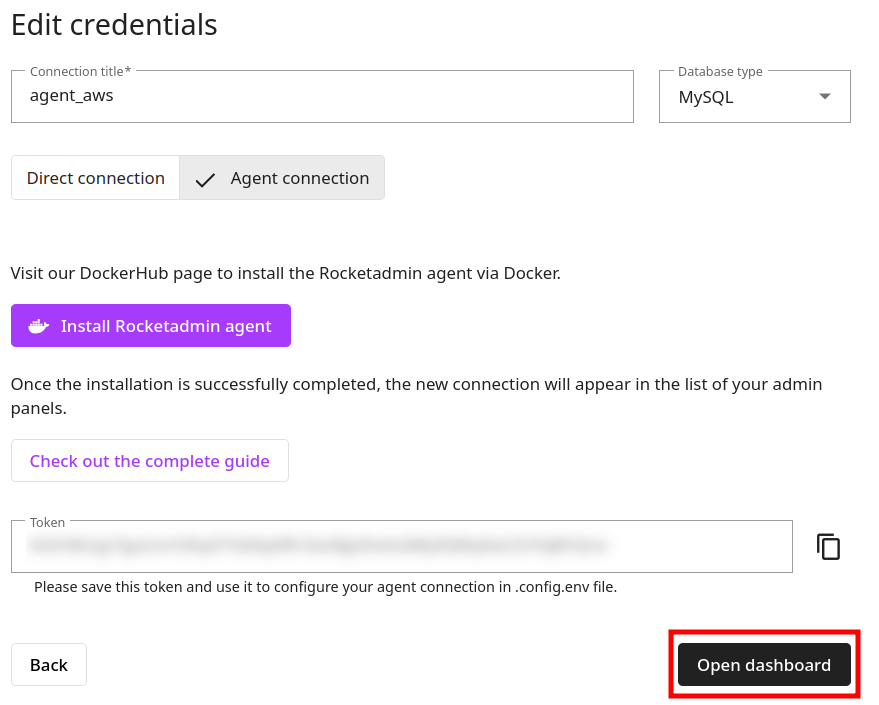
Your data appear in the Dashboard:
