How to connect your CassandraDB with Rocketadmin
This user guide outlines the procedure for establishing Rocketadmin connection to an AWS CassandraDB cloud database.
The instructions are general and do not contain any detailed explanations on specific CassandraDB features or configurations.
AWS settings
Create a user with access rights to keyspaces
-
Sign in to your AWS account.
-
Navigate to the Identitity and Access Management (IAM) service and create a user.
-
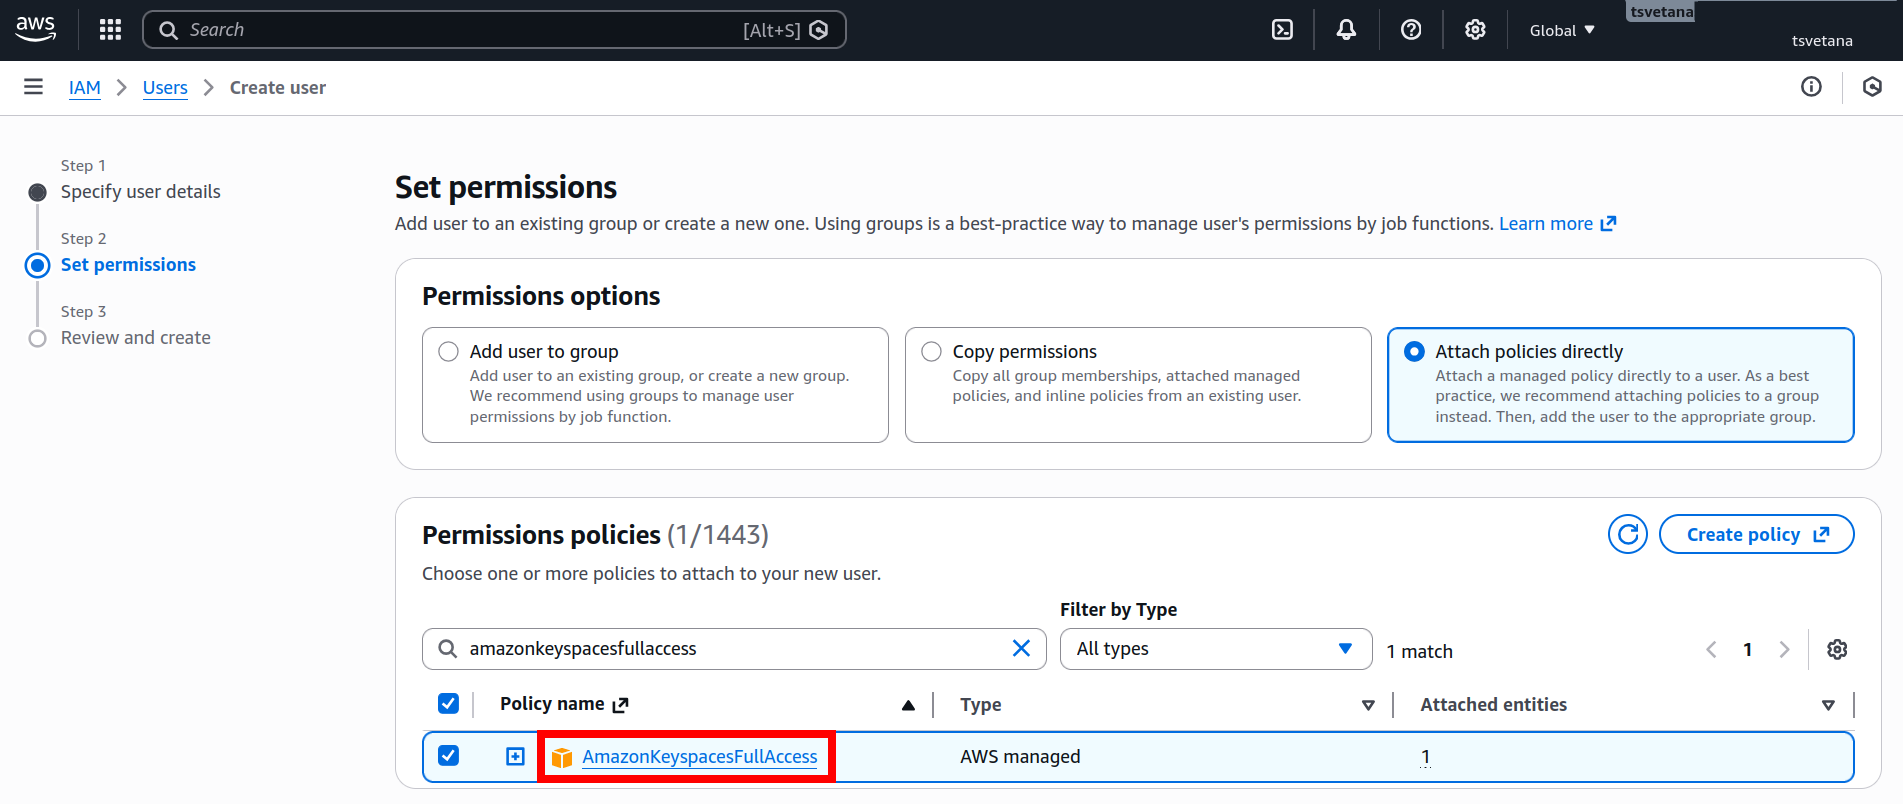
In the Permissions section add keyspaces policy depending on your preferences, for example full rights - AmazonKeyspacesFullAccess:
-
Review and confirm user creation.
-
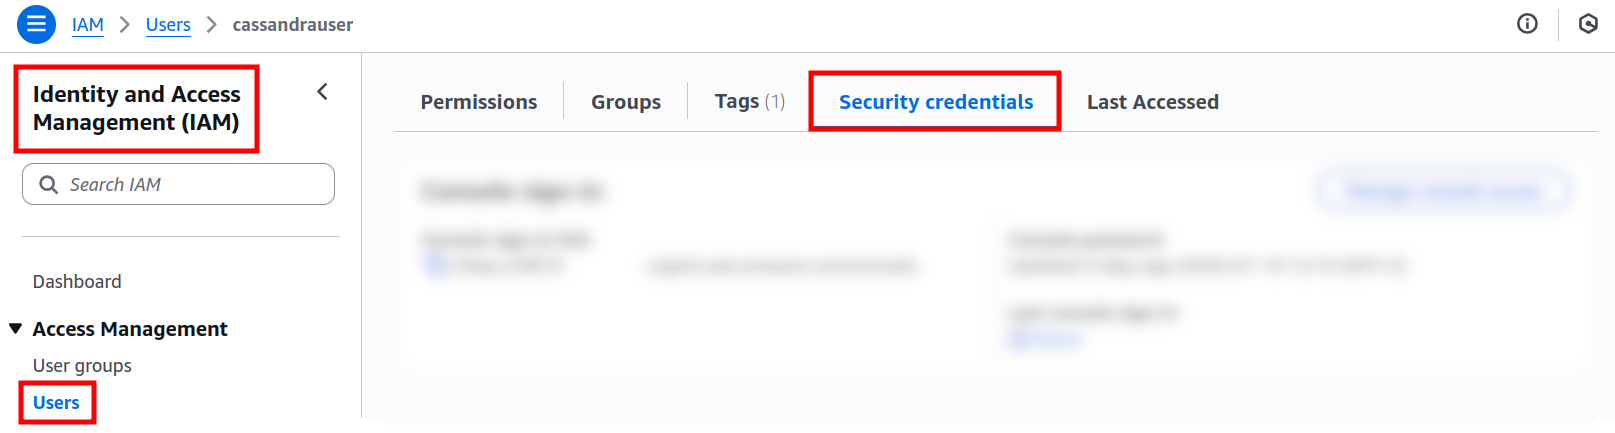
Open the user settings and navigate to the Security credentials:
-
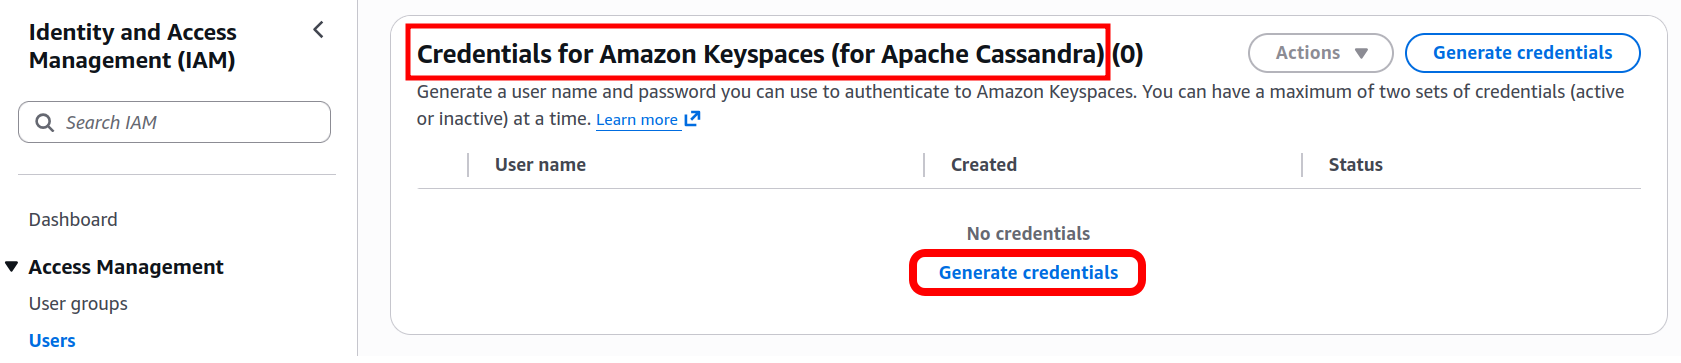
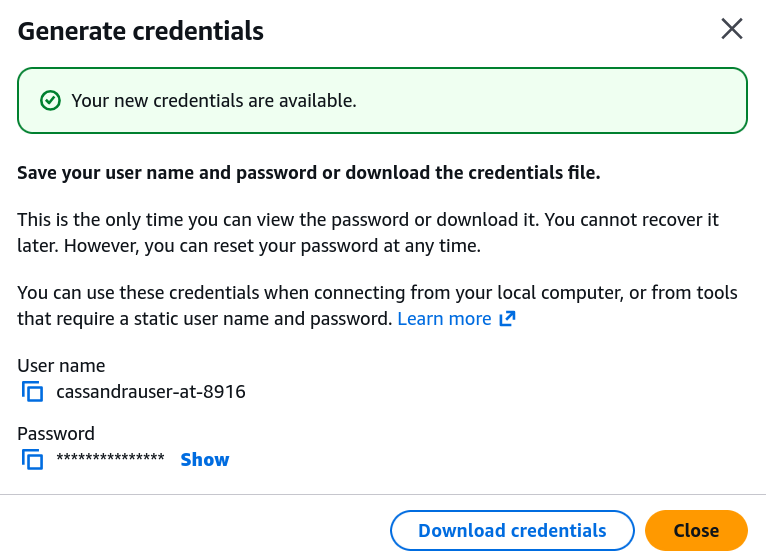
Scroll down to the Credentials for Amazon Keyspaces (for Apache Cassandra) and generate credentials:
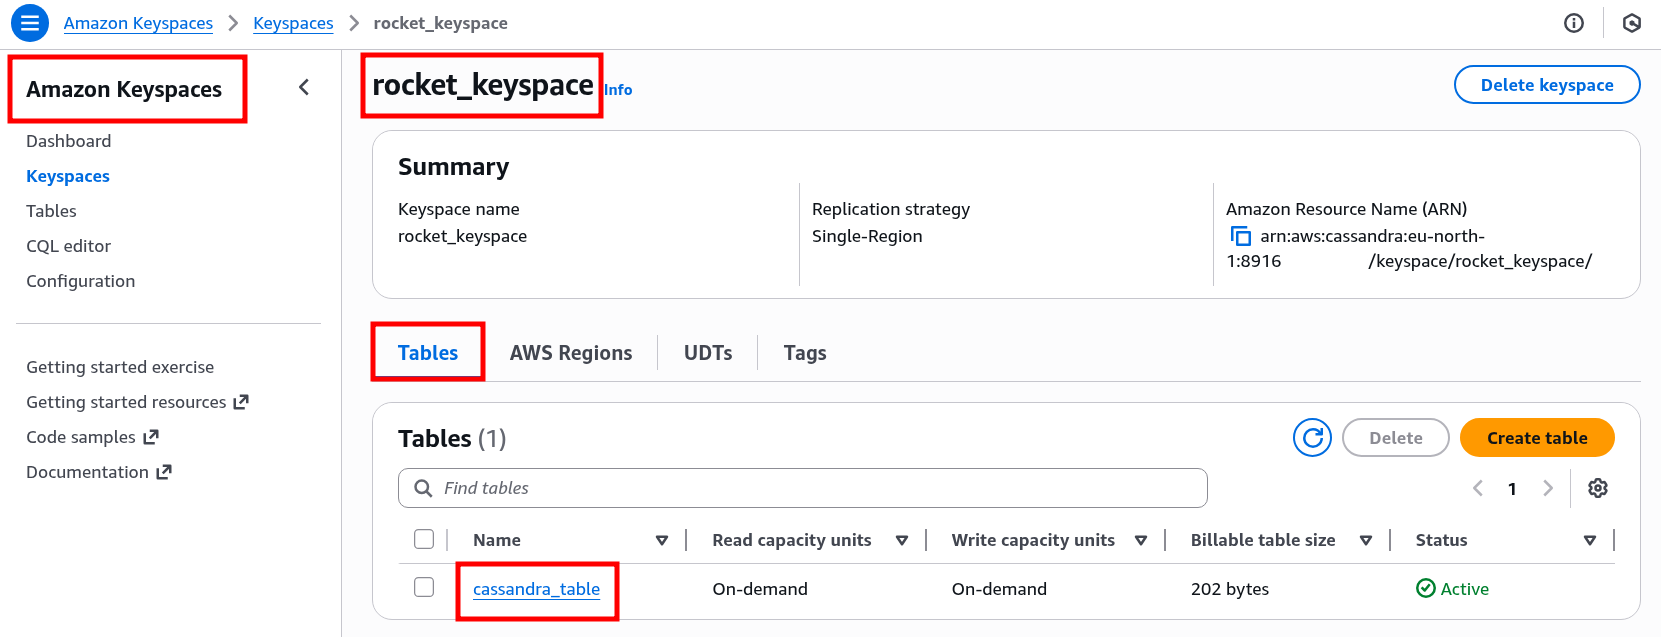
Create an Amazon keyspace and a table
- Sign in to the AWS console with the credentials of the created user.
- Navigate to the Amazon Keyspaces Dashboard.
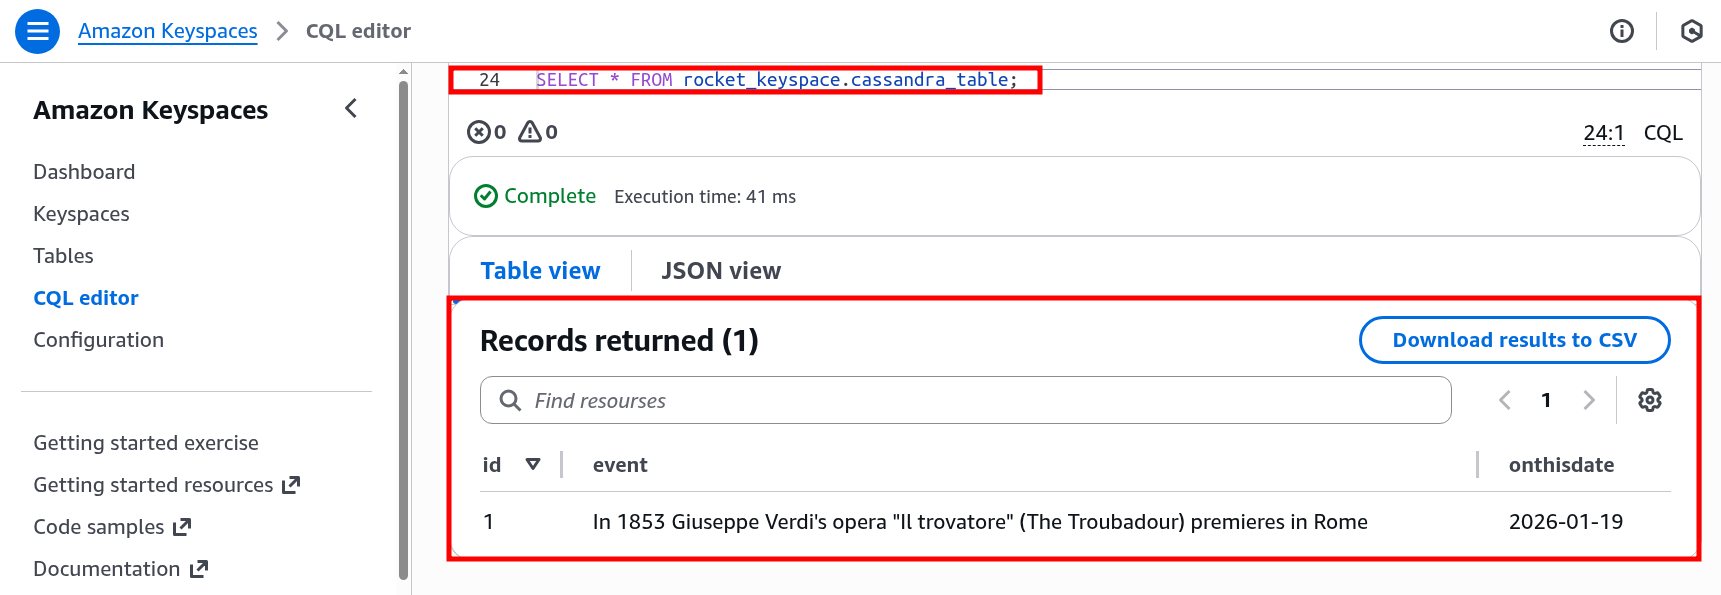
- Create a keyspace, a table and populate it with data:
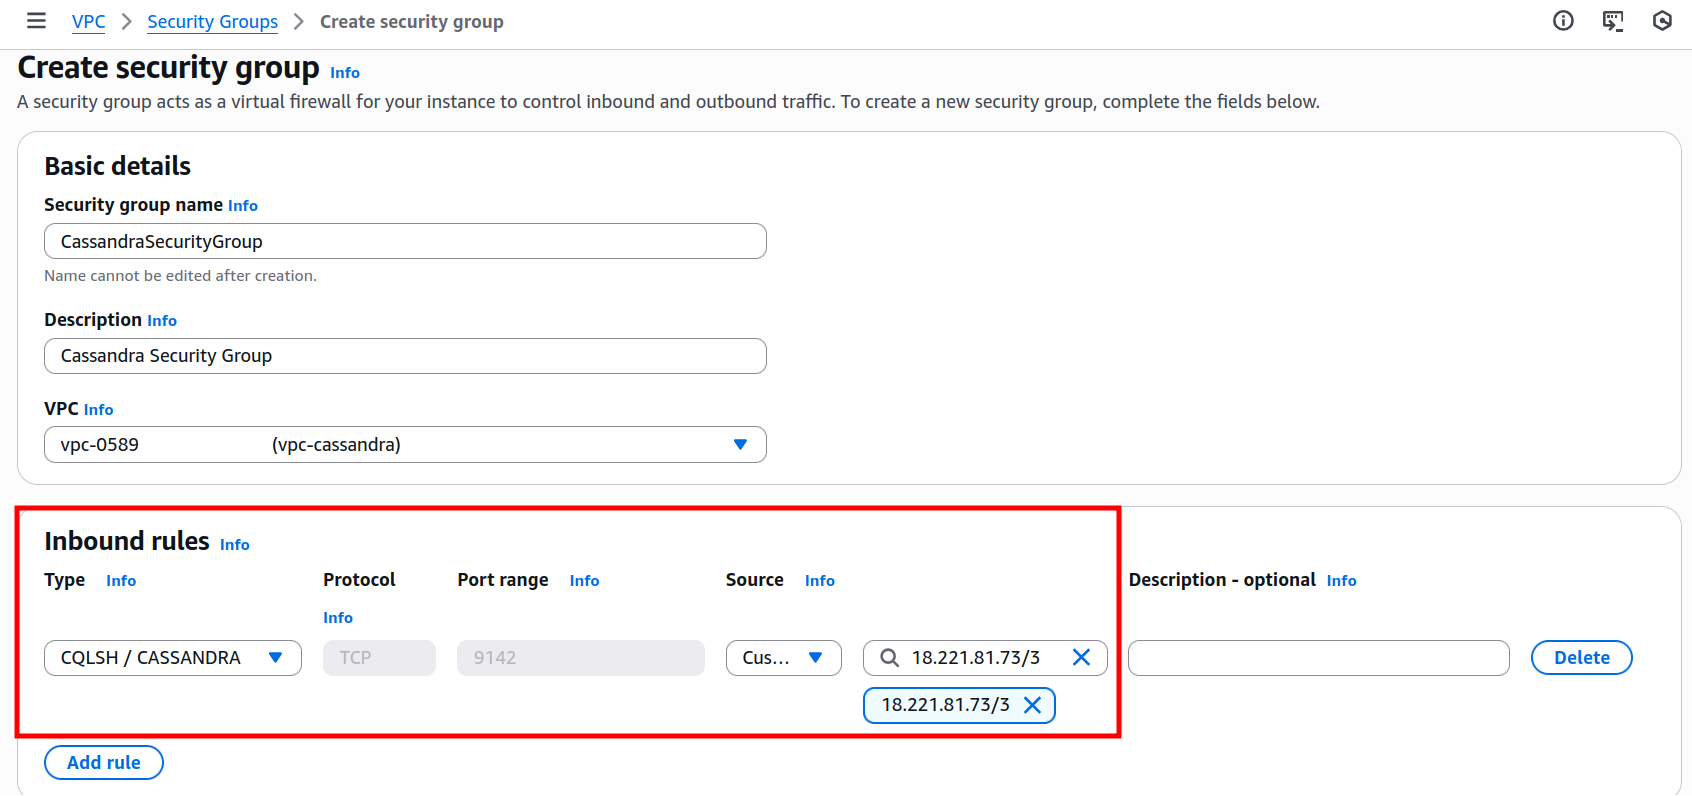
Enable Rocketadmin access to the keyspace
The last AWS configuration will allow Rocketadmin network access to the Amazon keyspace. Create (or use an existing) Virtual Private cloud (VPC) with a dedicated security group.
Then add the Rocketadmin IP address to the security group’s inbound rules as follows:
-
select Cassandra as rule Type
-
enter the Rocketadmin IP address 18.221.81.73/32 in the source field
Rocketadmin settings
The final steps of this guide include creating a Rocketadmin connection to the CassandraDB keyspace and table.
Follow the guidelines:
-
Sign in to your Rocketadmin account.
-
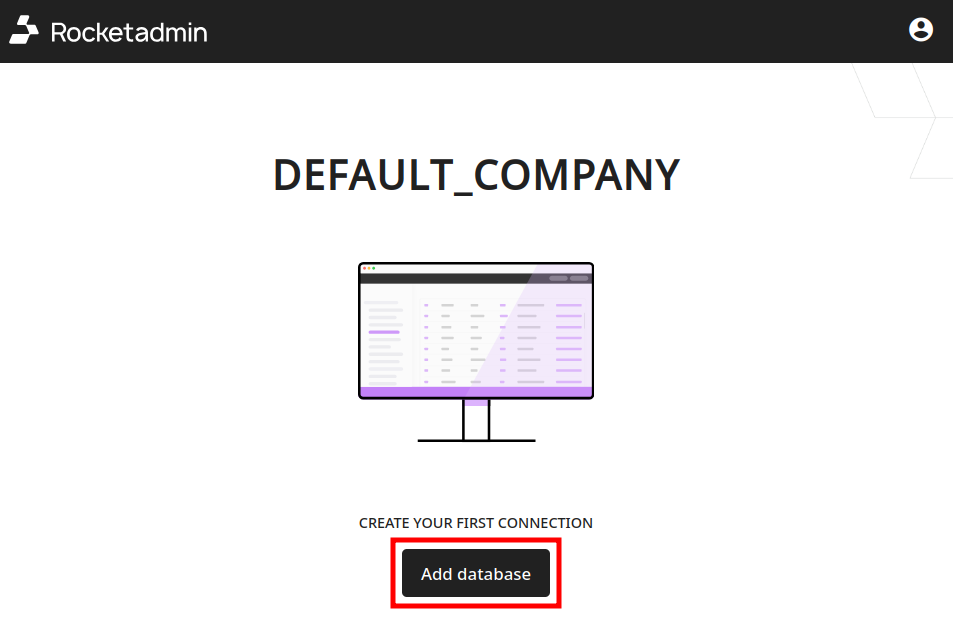
In the Dashboard click on Add database:
-
In the Connect a database screen:
-
enter a name for the connection
-
select Cassandra (ScyllaDB) as database type

-
-
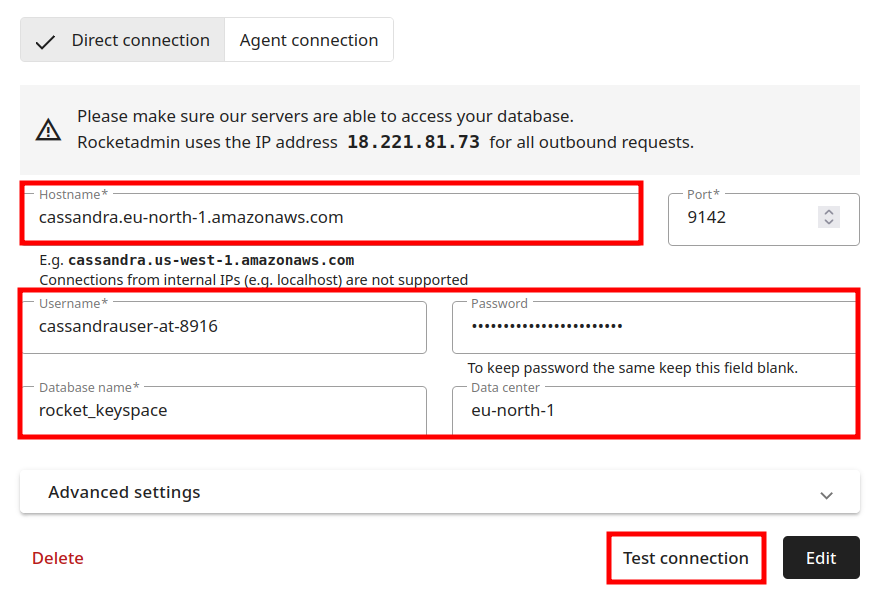
Provide the following information in the connection's details:
-
Hostname: the CassandraDB hostname
-
Username, Password, Database name (Keyspace name) and Datacenter name
-
-
You can expand the Advanced settings and configure one or more of the following options: Master password, SSH tunnel and SSL certificate
-
Click on Test connection.
-
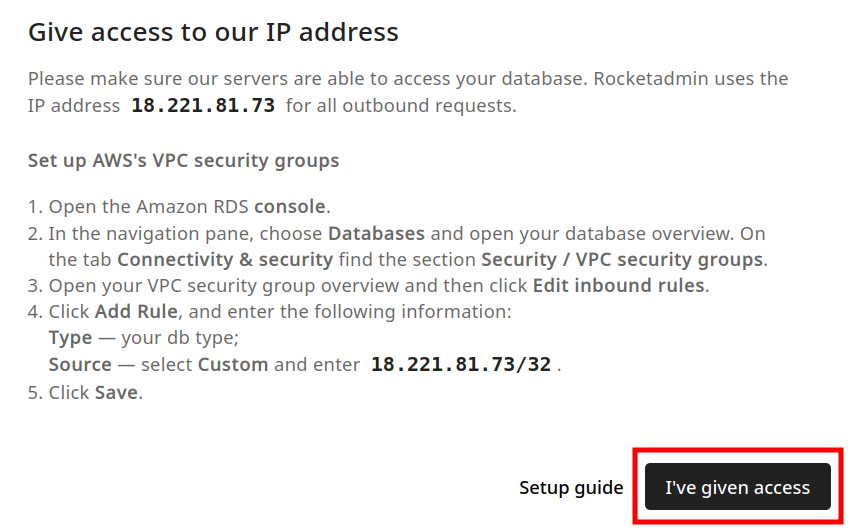
Once the connection is successful, click on Add. The following message appears (Give access to our IP address):
-
Since the Rocketadmin IP address has already been added to the list of allowed IPs, click on I've given access.
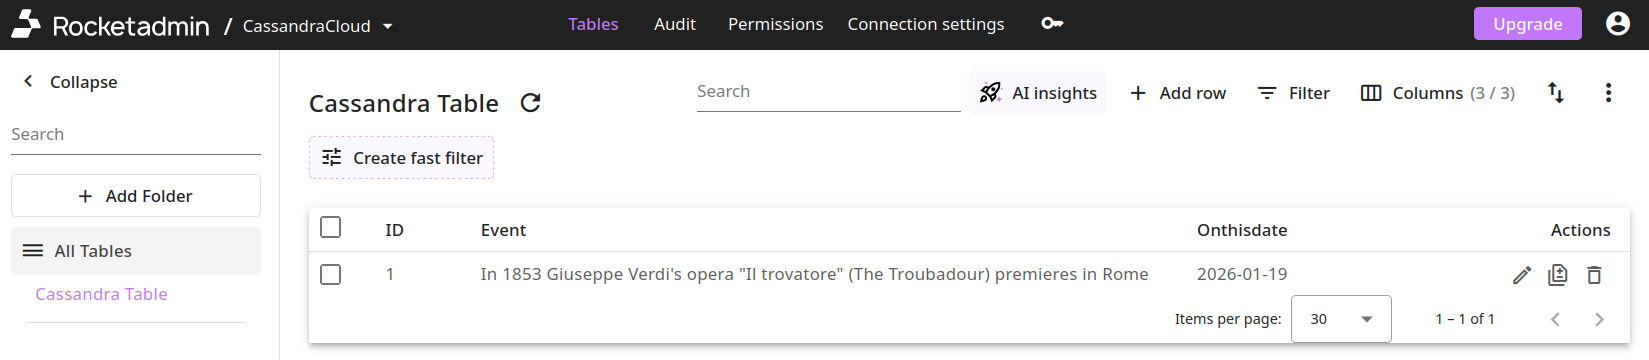
Your database and table appear in the Dashboard: